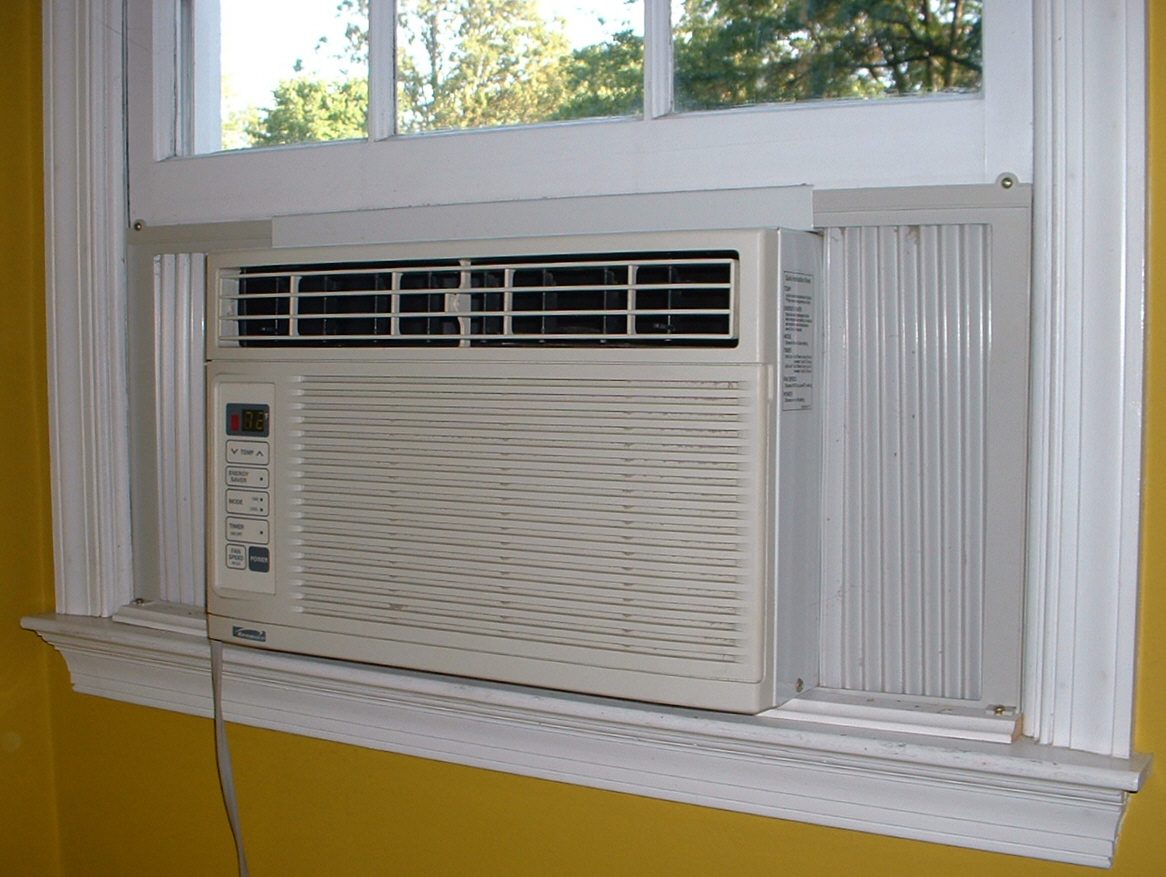
What cools a room when there is no window to put an air conditioner in? A through-the-wall air conditioner, such as this 11,800 BTU 230/208-volt model with heat and a remote, fits into a sleeve in the wall and stays there year-round. This guide explains how this type of unit works, where it fits, how to size it, and what to ask a contractor before installation.
What a Through-the-Wall Air Conditioner Is
A through-the-wall air conditioner is a self-contained unit that mounts in an opening cut through an exterior wall. Unlike a window unit, which sits in a window sash and can be removed at the end of the season, a through-the-wall unit lives in a metal sleeve that is built into the wall. The front of the unit faces the room and blows cool or warm air into it. The back of the unit faces outside and releases heat to the outdoor air. The sleeve stays in the wall even when the unit is removed for service, which makes replacement simpler later, because a new unit of the same size slides into the existing sleeve.
This model provides both cooling and heat, which makes it a year-round room solution rather than a summer-only appliance. In cooling mode it works like a standard air conditioner, pulling heat and moisture out of the room air and sending the heat outside. In heating mode it works as a heat pump, reversing the flow of refrigerant so that it gathers heat from the outdoor air and moves it inside. Some through-the-wall units use electric resistance heat instead of a heat pump, and some offer both. The heat mode on a heat pump costs less to run than plain electric heat in mild weather, but its output falls as the outdoor temperature drops, so the climate where you live shapes how much of the heating season it can cover.
The 11,800 BTU cooling capacity puts this unit in the medium-room class. BTU, short for British Thermal Unit, measures how much heat the unit can move in an hour. A unit of this size commonly suits a larger bedroom, a living room, a small apartment, or a hotel-style room. The 230/208-volt rating means the unit runs on a higher-voltage circuit than a standard wall outlet, which is normal for through-the-wall units of this size. It needs a dedicated circuit wired for that voltage, and that is a job for a licensed electrician. The remote control lets you change the temperature, the fan speed, and the mode from across the room, which matters when the unit sits low on a wall or behind furniture.
How It Differs from a Window Air Conditioner
The main difference is permanence. A window unit is a seasonal appliance. You lift it into a window, seal the gaps around it, and take it out when the season ends. A through-the-wall unit is a fixture. It sits in a sleeve that is part of the wall, and it stays in place through winter. That permanence brings advantages. The window stays free for light and for opening. The unit is more secure, because it cannot be pushed in from outside the way a window unit sometimes can. The seal around a wall sleeve is usually tighter than the seal around a window unit, so less outdoor air leaks in around it.
The permanence also brings responsibilities. Cutting an opening through a wall is a bigger job than setting a unit in a window, and it is not easily undone. The opening has to be framed properly, the sleeve has to be level and sealed against weather, and the wall has to be finished inside and out. If the wall is load-bearing, the framing work matters even more. This is why through-the-wall units are common in apartments, hotels, and offices, where the opening is built into the wall during construction, and less common as a do-it-yourself retrofit in a finished house. If your house does not already have a sleeve, ask a contractor what cutting the opening will involve before you buy the unit.
Another difference is size. Through-the-wall units are usually deeper than window units, because the whole unit has to reach through the thickness of the wall. The sleeve depth must match the wall thickness, and the unit must sit in the sleeve so that the outdoor side vents freely and the indoor side sits flush with the interior wall. A unit that is too deep for the wall will stick out inside the room. A unit that is too shallow will not reach the outside properly. Measure the wall, check the sleeve size, and confirm that the unit you are buying fits the sleeve you have or the sleeve you plan to install.
Sizing the Unit for Your Room
Size matters more than any feature listed on the box. A unit that is too small will run all day and still fall short on the hottest afternoons. A unit that is far too big will chill the room so quickly that it stops before it has stripped enough moisture from the air, leaving the room cool yet damp, and it will switch on and off too often. Many contractors begin with a rough sizing shortcut that links capacity to floor area, then correct it for the particulars of the room. That shortcut is only a first estimate, and a full load calculation is the proper way to fix the number.
As a broad guide, an 11,800 BTU unit commonly fits a medium room, such as a bigger bedroom or a modest living room with standard ceilings and ordinary insulation. A room with west-facing glass, a room under a sun-baked roof, a room with thin insulation, and a room that holds several people or heat-giving appliances all call for more capacity than a shaded, well-insulated room of the same floor area. Window count and direction, ceiling height, and your local climate all move the answer. A contractor who walks the room and works out the load can give you a figure based on your house instead of a guess taken from a chart.
Consider the daily life of the room as well. A bedroom that only needs cooling after dark is a different task from a living room where the family gathers in the afternoon sun. A room used through the year leans on the heat mode for a good share of its warmth, which makes heating output matter as much as the cooling figure. Share with the contractor how the room is lived in, which hours it is occupied, and which temperature feels right to you. Those details shape the sizing advice more than any number printed in a catalog.
Installation Notes
Installation of a through-the-wall unit is a job for a contractor and an electrician working together. If a sleeve already exists, the work is simpler: the old unit slides out, the sleeve is checked and cleaned, the new unit slides in, and the electrical connection is made. If no sleeve exists, the wall opening must be cut and framed, the sleeve installed and sealed, and the interior and exterior finishes repaired. The sleeve must be level, and it must slope very slightly toward the outside so that condensation drains out rather than into the room. Ask the contractor how the sleeve will be sealed against rain and air leaks, and how the inside and outside finishes will be made good.
The electrical work is a key part of the job. A 230/208-volt unit needs a dedicated circuit with the right breaker and the right outlet type, and the wiring must be sized for the load. The electrician should confirm the voltage available in your home and whether the existing wiring can serve the new unit or whether a new circuit must be run. Never adapt a through-the-wall unit to a standard outlet with an adapter, and never share its circuit with other large appliances. If the breaker trips repeatedly after installation, that is a sign of an electrical problem, not a reason to fit a larger breaker.
Placement matters too. The unit should sit where the air can spread across the room without blowing directly onto a bed, a desk, or a seating area. It should not sit behind a curtain or a piece of furniture that blocks the airflow. The outdoor side needs clear space for the fan to move air, so it should not face a wall, a fence, or dense shrubs close to the unit. If the unit sits low on the wall, keep the area in front of it clear. Before the contractor leaves, ask them to run the unit through cooling and heating, show you how the remote works, and explain how to clean the filter.
Using the Remote and the Controls
The remote control is more than a convenience. It lets you set the temperature, the fan speed, and the mode without walking to the unit, and it usually includes a timer and a sleep function. The timer lets you set the unit to switch on before you get home or to switch off after you fall asleep. The sleep function raises or lowers the target temperature gradually overnight, which saves energy and keeps the room comfortable while you sleep. Learn these functions before the first hot night, because fumbling with settings in the dark is no fun.
Most through-the-wall units also carry controls on the front panel, so the unit keeps working if the remote is lost or the batteries run out. Keep spare batteries for the remote, and always return it to the same spot. If the unit offers a dry or dehumidify setting, it runs mostly to strip dampness from the air, which can make a muggy room feel easier even when the temperature falls only slightly. The fan-only setting moves air without heating or cooling it, which suits mild days when you simply want a breeze in the room.
Maintenance and Care
A through-the-wall unit asks for only light, steady care. The filter behind the front grille traps dust before it can reach the coil. Wash it every few weeks while the unit is working hard, and more often in a home with pets or heavy dust. A dirty filter starves the coil of air, forces the unit to strain, and can lead to ice forming on the coil. The task is usually straightforward: open the front panel, pull the filter out, rinse it clean, wait until it is fully dry, and put it back. Never switch the unit on with the filter out, and never refit a filter that is still wet.
Once a year, have a technician check the unit before the cooling season. A yearly visit usually includes cleaning the indoor and outdoor coils, checking the drain, and looking at the electrical connections. The outdoor side of the unit collects leaves and dust, so keep the area outside the wall clear. If you notice weak airflow, ice on the coil, a musty smell, or water dripping inside the room, switch the unit off and call for service rather than letting it run. Water inside the room usually means the drain is blocked or the unit is not level, and both are worth fixing promptly.
In winter, a through-the-wall unit that stays in the wall should have its outdoor side protected if the maker provides a cover or recommends one. A cover keeps out snow and wind-driven rain, and it keeps the unit from losing heat through the sleeve when it is not running. Do not cover the unit while it is running in heat mode, and do not seal the sleeve so tightly that moisture is trapped inside. If you remove the unit for winter in a climate where that is common, store it in a dry place and cover the sleeve opening with the panel the maker provides, so cold air and pests do not come through the wall.
Questions to Ask Your Contractor
Ask the contractor whether your wall already has a sleeve and whether the new unit fits it, or what cutting a new opening will involve and what it will cost. Ask about the electrical work: whether a new dedicated circuit is needed, what it will cost, and who does it. Ask where the unit will sit in the room and why that spot was chosen. Ask how the sleeve will be sealed against rain and air leaks, and how the inside and outside finishes will be repaired.
Ask about the heat mode and what it can manage in your coldest weather, and whether a backup heat source will be needed on the coldest nights. Ask which parts of the equipment and the installation the warranty protects, and who you phone when a fault appears in the first year. Ask the contractor to demonstrate filter cleaning and the remote before they leave. Ask for the names of recent through-the-wall customers nearby and speak with them. An installer who welcomes hard questions is usually one who stands behind the work, and how those questions are answered tells you plenty about the person you are hiring.